
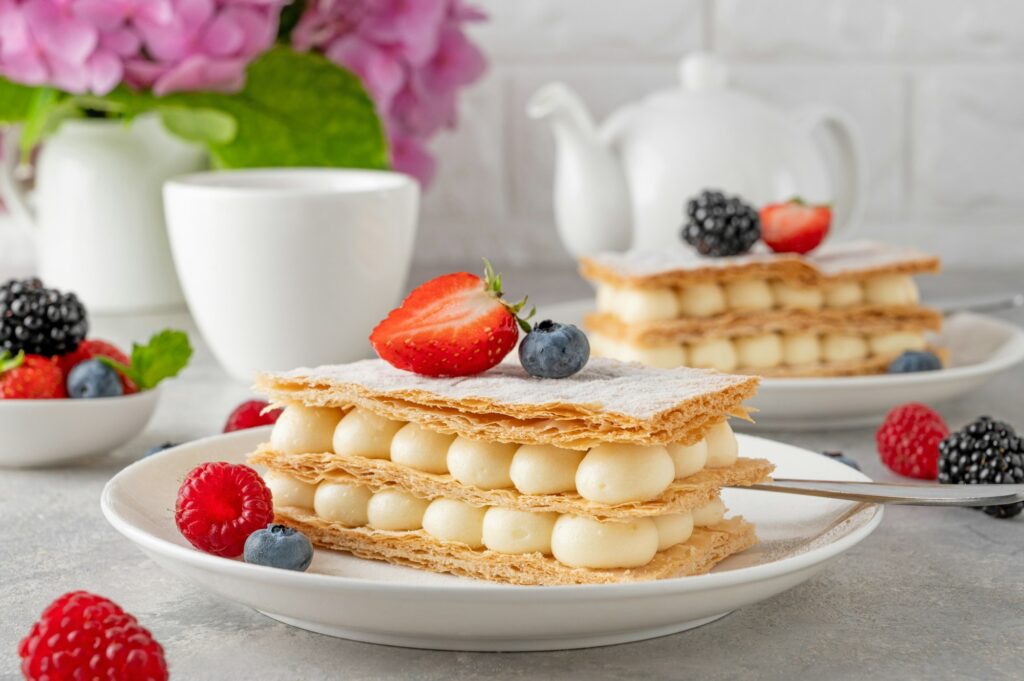
Dessert shells, those versatile components crucial to many exquisite desserts, serve as more than just an aesthetic foundation. They are fundamental in enhancing the overall sensory experience of desserts, transforming the simplest of fillings into a masterpiece of flavors and textures. Understanding the shelf life of these dessert shells is paramount for both quality and safety, ensuring that every bite remains as delightful as intended.
From hosting elaborate dinner parties to enjoying a serene evening at home, dessert shells add a touch of sophistication and elegance, elevating any occasion. This guide is dedicated to navigating the art and science of selecting, crafting, and filling dessert shells, ensuring that your culinary creations captivate both the eyes and the palate.
With a focus on shelf life, storage tips, and maintaining freshness, we’ll explore how to extend the enjoyment of your dessert shells, making every dessert occasion special. Whether you’re a seasoned baker or new to the kitchen, understanding the longevity of these essential dessert components is key to perfecting your dessert repertoire.
Stay tuned as we explore how the unique characteristics of different types of dessert shells influence their shelf life and storage methods.
Factors Influencing Shelf Life
The longevity of dessert shells is not a fixed attribute but rather a variable quality influenced by a range of factors from the ingredients used to the conditions under which the shells are stored. Understanding these factors is crucial for ensuring that your dessert shells maintain their optimal quality for as long as possible.
Ingredients:
The components of your dessert shell play a significant role in determining its shelf life. For instance, shells made with a high proportion of butter or eggs, like tart shells, may spoil quicker due to the fat content, while phyllo shells, which contain less moisture, tend to last longer. The freshness of these ingredients at the time of baking also affects longevity.
Storage Conditions:
Temperature and humidity are critical factors. Dessert shells stored in a cool, dry place last longer than those kept in warm, humid conditions. Moisture is particularly detrimental, as it can lead to the development of mold or make the shells soggy.
Filling:
If you’re storing dessert shells already filled, the type of filling can significantly impact the shelf life. Fillings that contain dairy or eggs, such as custard or cream-based fillings, shorten the lifespan of dessert shells due to their perishability.
Packaging:
Proper packaging is essential to protect dessert shells from the elements and extend their shelf life. Air-tight containers can prevent the ingress of moisture and keep out unwanted odors, while also reducing the risk of the shells becoming stale.
By closely monitoring these factors and adjusting storage practices accordingly, bakers and dessert enthusiasts can significantly extend the enjoyment of their dessert shells, ensuring they remain crisp, fresh, and ready to impress at a moment’s notice.
Storage Guidelines for Dessert Shells

Ensuring your dessert shells maintain their texture and taste over time hinges on proper storage techniques. Whether dealing with unbaked or prebaked shells, the key is to minimize exposure to air and moisture, which can drastically affect their quality.
Storing Unbaked Dessert Shells:
Unbaked shells, particularly those rich in butter and eggs like tart shells, are best stored in the refrigerator for no more than 2-3 days. Wrapped tightly in plastic wrap or placed in an airtight container, they can retain their texture without absorbing any odors. However, it’s advisable to bake these shells as soon as possible to enjoy their peak freshness and flavor.
Extending the Life of Prebaked Shells:
Prebaked shells offer more flexibility. In the refrigerator, wrapped in plastic or sealed in containers, they can last 1-2 weeks. To further extend their usability, freezing is an excellent option. Properly wrapped prebaked shells can last 4-6 months in the freezer. Thawing them in the refrigerator overnight before use preserves their quality.
For both unbaked and prebaked shells, the refrigerator acts as a short-term solution, perfect for when you plan to use them within days. Freezing, on the other hand, is ideal for long-term storage, ensuring you have dessert shells ready for impromptu baking sessions.
Best Practices for Freezing:
When freezing, let the shells cool completely if they are freshly baked. Wrap each shell individually in plastic wrap, then again in aluminum foil to protect against freezer burn and odor absorption. Labeling each package with the freezing date ensures you use the oldest shells first, maintaining a rotation that supports optimal freshness.
By adhering to these storage guidelines, you can significantly reduce food waste and ensure your dessert shells are always at their best when you’re ready to fill them with your favorite flavors. Proper storage not only maintains the integrity of the shells but also supports your creative baking endeavors, allowing for delicious desserts on any occasion.
Maximizing Freshness of Filled Dessert Shells
Achieving the perfect balance between a delectably crisp shell and a luscious filling is an art form. However, once dessert shells are filled, the clock starts ticking on their freshness. Here are tailored strategies to ensure filled dessert shells remain as delightful as when they were first prepared.
Immediate Consumption:
Ideally, filled dessert shells should be enjoyed soon after assembly to savor their intended texture and flavor. This is especially true for shells filled with moisture-rich ingredients like fruit or cream, which can soften the shells over time.
Short-term Refrigeration:
If immediate consumption isn’t an option, filled dessert shells can be refrigerated for 1-3 days. To maintain their quality, place them in an airtight container or cover them lightly with plastic wrap. This method works well for fillings that are less likely to make the shell soggy, such as thick ganache or custard.
Protective Barriers:
Applying a thin layer of chocolate or a glaze inside the shell before adding the filling can create a moisture barrier. This technique prolongs the shell’s crispness, offering a slight extension to the dessert’s shelf life without compromising the shell’s integrity.
Consider the Filling:
The type of filling greatly influences how long the filled shells will retain their quality. Denser, less moist fillings will generally allow the shells to last longer than those with high moisture content.
Temperature Management:
Keep filled dessert shells refrigerated until shortly before serving. Chilling them slows down the moisture migration from the filling to the shell but remember, the cooler temperature can also firm up some fillings, altering the texture slightly.
By integrating these practices, you can extend the enjoyment of your filled dessert shells, ensuring they remain a hit whether they’re served at a large gathering or as a personal treat. Balancing the components and understanding their interactions is key to preserving the delightful contrast between the crisp shell and the soft filling.
Freezing Dessert Shells
Freezing dessert shells is a practical solution for extending their shelf life while preserving their texture and taste. Whether you’ve baked an excess batch or want to prepare in advance for upcoming dessert creations, proper freezing techniques are essential. Let’s delve into the guidelines for freezing and thawing dessert shells to ensure they maintain their quality.
When freezing dessert shells, it’s crucial to follow a few simple steps to prevent freezer burn and maintain their freshness:
Cooling:
Allow the baked dessert shells to cool completely before freezing. This helps prevent condensation, which can lead to soggy shells or ice crystals forming on their surface.
Packaging:
Wrap the cooled dessert shells tightly in a layer of plastic wrap, followed by a layer of aluminum foil. This double layer of protection helps seal in moisture and prevent freezer burn.
Labeling:
Clearly label the packaged dessert shells with the date of freezing to keep track of their freshness. It’s also helpful to indicate whether they are prebaked or unbaked, especially if you have different types stored in the freezer.
Storage:
Place the wrapped dessert shells in airtight containers or freezer bags to further protect them from freezer odors and moisture. Arrange them in a single layer to prevent breakage or deformation during freezing.
Once properly packaged, you can store dessert shells in the freezer for extended periods without compromising their quality. However, it’s essential to thaw them correctly when you’re ready to use them in your dessert creations.
Thawing Dessert Shells
Thawing dessert shells requires careful planning to ensure they retain their texture and taste. Here are some tips for thawing frozen dessert shells:
Refrigeration:
The recommended method for thawing dessert shells is to transfer them from the freezer to the refrigerator. Allow them to thaw slowly overnight or for several hours until they are completely thawed. This gradual thawing process helps prevent moisture loss and maintains the integrity of the shells.
Room Temperature:
If you’re short on time, you can thaw dessert shells at room temperature. Place them on a plate or baking sheet and let them sit at room temperature for 1-2 hours, depending on their size and thickness. Avoid thawing them in direct sunlight or near heat sources, as this can lead to uneven thawing and potential texture changes.
Microwave:
While not the preferred method, you can use the microwave to thaw dessert shells if you’re in a hurry. Place the wrapped shells on a microwave-safe plate and use the defrost setting at a low power level. Check them frequently to prevent overheating and ensure they thaw evenly.
Once thawed, it’s crucial to handle the dessert shells with care to maintain their quality. Avoid refreezing thawed dessert shells, as this can compromise their texture and taste. Instead, plan to use them promptly in your dessert recipes to enjoy the best results.
Signs of Spoilage
Recognizing the signs of spoilage in dessert shells is essential for ensuring the safety and quality of your baked goods. While frozen dessert shells can maintain their freshness for extended periods when stored properly, it’s essential to be vigilant for any indications that they may have gone bad. Here are some common signs of spoilage to watch out for:
Mold Growth:
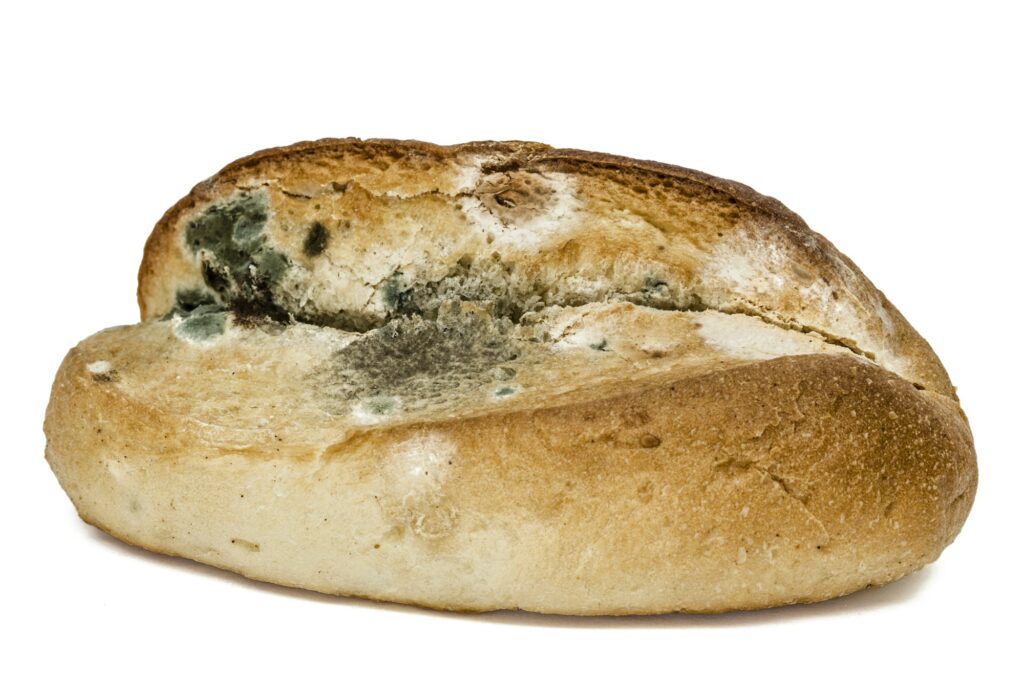
Visual inspection is crucial when assessing the condition of dessert shells. If you notice any fuzzy or discolored patches on the surface of the shells, it’s likely mold growth. Mold can develop in moist environments, so thoroughly inspect both unbaked and prebaked shells before using them in your recipes.
Off Odors:
Spoiled dessert shells may emit unusual or unpleasant odors that indicate bacterial growth or degradation of ingredients. If you detect any off smells, such as a sour or rancid odor, it’s best to discard the shells to prevent the risk of foodborne illness.
Texture Changes:
Frozen dessert shells that have been improperly stored or thawed may experience changes in texture. Look for signs of freezer burn, which manifests as dry, leathery patches on the surface of the shells. Additionally, texture changes such as sogginess or brittleness can occur if the shells have absorbed excess moisture during freezing or thawing.
Taste Test:
If you’re unsure whether dessert shells have spoiled, you can perform a taste test to assess their quality. However, exercise caution, especially if the shells have been filled with perishable ingredients. Any unusual or off flavors should prompt you to discard the shells and avoid consuming them.
Regularly inspecting your stored dessert shells for signs of spoilage helps prevent the risk of serving compromised or unsafe food to yourself and others. When in doubt, it’s always best to err on the side of caution and discard any questionable shells to ensure the integrity of your desserts.
FAQs
Q: Can dessert shells be made in advance?
A: Yes, dessert shells can be prepared in advance and stored for future use. By following proper storage guidelines, you can make and freeze unbaked or prebaked shells to save time when assembling desserts.
Q: How to prevent dessert shells from becoming soggy?
A: To prevent dessert shells from becoming soggy, ensure they are fully cooled before packaging for freezing. Double-wrap them in plastic wrap and aluminum foil to protect against moisture loss and freezer burn. Thaw them slowly in the refrigerator to maintain their texture.
Q: Are there gluten-free or vegan options for dessert shells?
A: Yes, there are gluten-free and vegan options for dessert shells, catering to individuals with dietary restrictions or preferences. You can explore alternative ingredients such as almond flour or coconut oil to create gluten-free or vegan-friendly dessert shells.
Conclusion
In conclusion, understanding the shelf life and storage guidelines for dessert shells is essential for maintaining their quality and ensuring optimal freshness in your baked creations. By exploring the factors influencing shelf life, storage methods, and practical tips for maximizing freshness, you can confidently incorporate dessert shells into a wide range of desserts with delicious results.
Whether you’re preparing unbaked shells for future use or freezing prebaked shells to streamline your baking process, following proper techniques and guidelines is key. By recognizing the signs of spoilage and addressing common questions about dessert shells, you can navigate the world of baking with confidence and creativity.
As you experiment with different types of dessert shells and fillings, remember to prioritize food safety and quality. With proper storage and handling, dessert shells can remain a versatile and delightful component in your culinary repertoire, adding flavor and flair to your favorite desserts.